Archive for the ‘Gift Ideas’ Category

Holiday Gift Idea: Gluten-Free Crunchy Chex Snack Mix

Monday, December 22nd, 2014
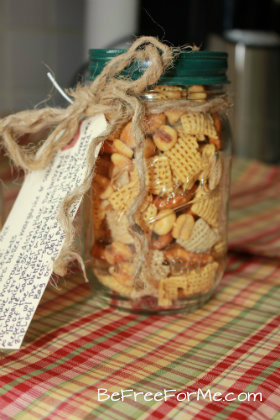
Eeeekks! Christmas is almost here… and if you’re like me you’re still looking for those “little something” gifts that you bring to holiday parties and have on hand for last minute gifting.

My Crunchy Chex Snack Mix is the perfect hand-made gift. By giving just the key ingredients and having the recipient make the snack mix themselves by adding melted butter, the shelf-life is longer than giving a prepared mix. However, you can also prepare the mix in entirety and give the snack mix “ready-to-eat” if you want too!

This single-serve snack idea has a cute-as-a-button presentation. It’s great for anyone on a gluten-free diet  since it’s simple to prepare and enjoy in an office, dorm room, or even right at home.

The only extra two things your gift recipient will need to make this salty snack is 1 ½ tablespoons of butter (or margarine, or butter substitute). So it is quick, easy and convenient. To make things easier for the recipient for when they make the mix, you can even include the parchment paper which is needed to cool the snack mix after its been microwaved – just roll the parchment and tie it with the twine on the outside of the mason jar. Anyone you give this gift to will appreciate your crafty thoughtfulness the next time a snack attack creeps up. Enjoy and happy gluten-free gifting!

Gluten-Free Crunchy Snack Mix

Supplies Needed:

Four (4) pint sized mason jars (I painted the tops for a more finished & festive look… but not necessary)

Four (4) snack sized ziplock bags, or small zip-top bags found in a craft store

Optional: Four (4) 20” lengths of Parchment paper (I used unbleached – I like the color better!)

Twine

Four (4) shipping tags for writing directions for preparation on the back… and a cute note on the front … I like “For Gluten-Free Snack Attacks” =)
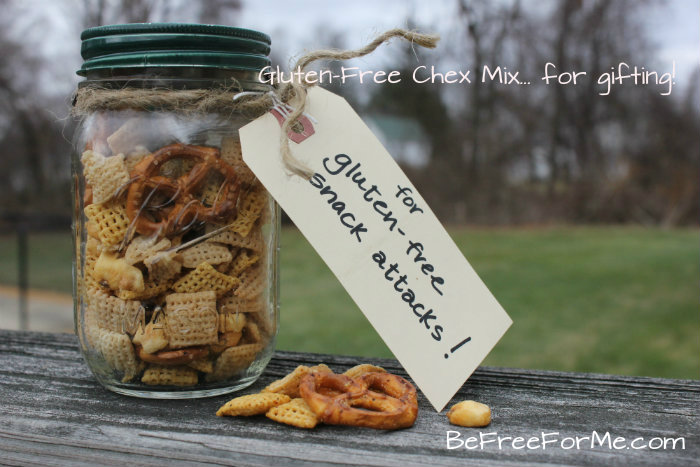
Ingredients Needed:

1 ½ cup Corn Chex

1 ½ cup Rice Chex

1 cup mini gluten-free pretzels

½ cup corn nuts (Check label for allergens)

¼ cup salted peanuts (omit if concerned with a nut allergy)

½ teaspoon (heaping) garlic powder

1/4 teaspoon (heaping) chili powder

1/4 teaspoon (heaping) black pepper

1/4 teaspoon (heaping) of Mrs. Dash Lemon-Pepper Seasoning

1/4 teaspoon salt

1/8 teaspoon (heaping) of paprika

1 teaspoon red pepper flakes
Directions:

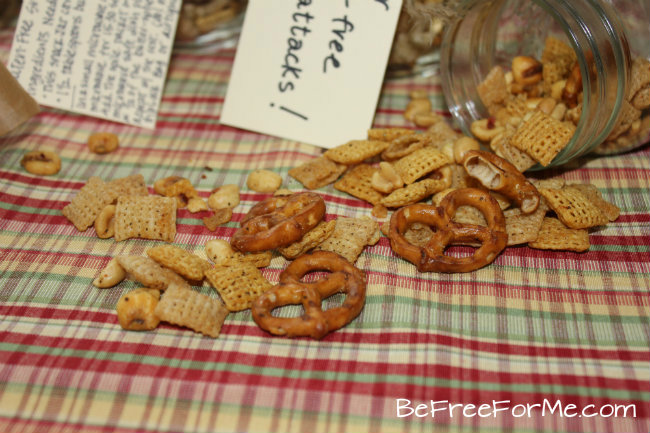
In a large mixing bowl combine the first five (5) ingredients. Toss gently to mix and distribute evenly in the four (4) mason jars, being careful to include the peanuts and corn nuts (which may fall to the bottom of the mixing bowl) into each jar. Leave about ½” on the top of each jar.

In a small mixing bowl combine the last seven (7) ingredients. Blend well. Evenly distribute into the 4 small plastic bags. Remove air from each spice bag, and seal well. Roll up and place on top of the each jar. Fill in extra room with additional Chex mix, peanuts, pretzels or corn nuts, if desired. Place cover on tightly.

If desired, fold the parchment paper in ½ lengthwise and roll into a tube. Tie each with a bit of twine.

With additional twine add the preparation directions that are written on shipping tags. (See preparation directions below).

Preparation Directions: (Include these with the gift)

Gluten-Free Snack Mix

Ingredients Needed:

Contents of this Snack Jar

1 ½ tablespoon of butter, margarine or substitute

In a small microwave bowl, place 1 ½ tablespoons of butter (or margarine or butter substitute) and microwave for 15-30 seconds, or until melted. Add the spice packet to the melted butter and mix well.

In a large microwave safe bowl place about ½ of the snack mix and add in about ½ of the melted butter-spice blend. Toss gently until the snack mix is well coated. Add in the rest of the snack mix and butter-spice blend, and repeat. Microwave for about 3 minutes, mixing 1/2 way through cooking time.

Place the Snack Mix on the parchment paper (or cookie sheet or tin foil) and let cool. Store in Ziplock bag or airtight container.
Need a cool & yummy gluten-free gift? Check out the KIND Cube

Thursday, December 11th, 2014

Need a gift for a Yankee Swap that everyone will be trading for? Looking for that perfect gift for your gluten-free best friend who deserves nothing but the best? Searching for some healthy, yet delicious, snacks to help a college student get through finals?
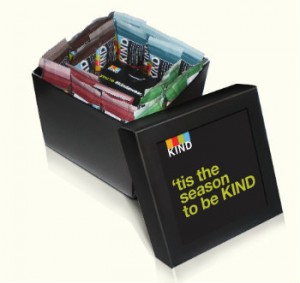
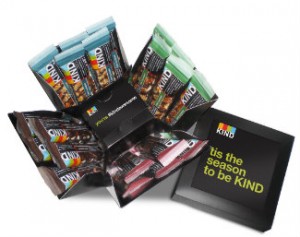
Well… I found the perfect gift… the KIND Cube.

I admit, at first I thought that the KIND Cube was… ahhmmm … well, just a BOX of KIND Bars – but how wrong I was. This cube is an origami-type of contraption that pops downward when opened. The sides are packed with 20 full-sized KIND Bars (5 each of the Dark Chocolate Nuts & Sea Salt, Dark Chocolate Mocha Almond, Dark Chocolate Chili Almond and the Dark Chocolate Cinnamon Pecan).

The cube is delivered in an all-black box with the KIND logo on the side. Nestled in ever so snuggly, the cube, once removed and opened, reminds me of a Jack-in-the-Box nicely waiting to surprise and fill the recipient with KIND-ness and glee.

Plus, this is the gift that keeps giving. Inside every KIND Cube is a “Kindawesome Card” – a card that the recipient can pass along to someone that makes the world more awesome through kindness. The card can be redeemed online for a handful of KIND bars.

So, if you’re looking to spread some holiday kindness (that keeps on spreading!), check out this link on Amazon to purchase the KIND Cube (and take advantage of the FREE shipping, too!)

Holiday Gift Idea: Gluten-Free Cookie Mix in a Jar

Thursday, December 20th, 2012

What to give? What to give? It seems that every Holiday season that question pops-up time and time again… A small token of thanks to the Mom in the neighborhood who gets your kids off the bus, gives them an after-school snack, and watches them for a hour or so whenever you’re in a bind; a little something for your hair stylist who son just got diagnosed with celiac disease; or a hostess gift for your sister who, every year, has a huge whole-family holiday get-together, and, like you, is on a gluten-free diet.
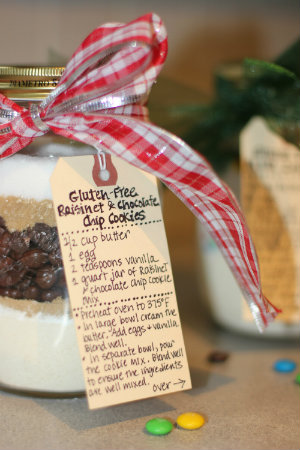
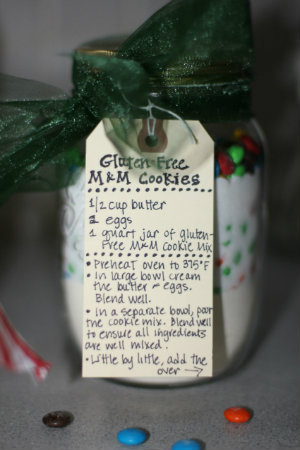
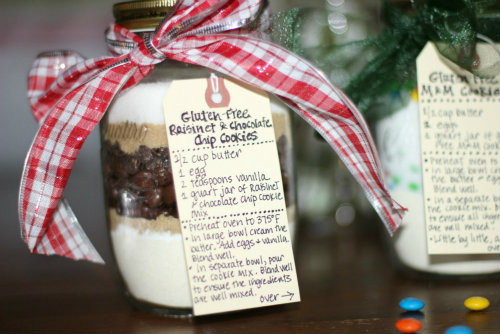
Often I like to make a big batch of gluten-free cookies as a token of my appreciation. But let’s face it… sometimes I just don’t have the time, or the oven space, to make the dozens and dozens of cookies needed to show my gratitude.

That is when I decided to give the gift of convenience – both for me and the recipient of the gift: Gluten-Free Cookie Mix in a Jar.

For me the gift is perfectly convenient since no baking is required and many jars for gifting can be assembled at one time. And for the recipient the gift is perfect since they can bake off the cookies after the holidays – after the hustle and bustle, and after the platter-after-platter of holiday cookies have been gobbled up.

At the end of this blog I have included instructions on making two of my favorite gluten-free baking mixes, along with the coinciding recipes to attach to the jars with the baking directions. You can also “jar” your own favorite cookie mix too if you choose. Following are some basic rules of thumb when “jarring” gluten-free cookie mixes:

The Jar: Use a 1 quart mason jar / or screw top jar. A wide mouth jar is easier to get the ingredients in layers, and using a canning funnel makes the job easier too.

4 Cups = 1 Quart: Remember that there is 4 cups in 1 quart. This means that all of the ingredients that you include in your 1 quart jar should equal approximately 4 cups. Remember though that there is a bit of space for “air” at the top of each jar… so you have a bit of extra room if needed. I often use a 1 liter jar to give myself a bit more room to add in extra chocolate chips, M&M’s or other yummy mix-ins.

Layer It: When you layer the ingredients put the “finer” (think gluten-free flours and granulated sugar) at the bottom of the jar, layered with the medium texture items (such as oatmeal and raisins) and finally topped with the chunkiest ingredients (This would include M&M’s, Candy Bar Chunks, Chocolate Chips). Before you start layer think to yourself, “Will this ingredient be able to sift through a lower layers in the jar?”  If the answer is yes, layer those ingredients towards the bottom of the jar.

Stack the Layers: After you put in a layer of an ingredient, push the ingredient down with the back of a spoon, your fingers, or the side of a meat mallet. This will make a better presentation and will ensure all the ingredients fit in the jar. You can use a slim rubber spatula to “edge” each layer for a nice clean line.

Raisinet & Chocolate Chip Gluten-Free Cookie Mix

1 ¾ cup gluten-free all-purpose flour blend
1 1/2 teaspoon salt
1 teaspoon baking powder
¼ cup brown sugar, plus 2 tablespoon
1 cup Raisinets (I used ½ cup dark chocolate and ½ cup of milk chocolate. NOTE: One 3.5 ounce package yields ½ cup)
¼ cup chocolate chips (check label for allergens)
¼ cup brown sugar
¾ cup sugar

Other:
1 quart wide mouth Mason jar
Ribbon / Fabric / Tulle
Printed recipe tag
Twine / string to hang recipe tag

Layer the ingredients in the order above in a wide mouth Mason jar, or similar. Pack each layer (with the exception of the Raisinete’s and Chocolate Chips) with the back of a spoon or other utensil (the backside of a mallet for meat works great) before adding the next ingredient. You can also “skim” the edges of each layer to get a clean line by using a slim rubber spatula before adding the next ingredient. Be extra careful to pack the brown sugar layers to ensure the Raisinets and the chocolate chips stay secure.

Seal the top tightly. And keep jar upright. Place a ribbon and/or piece of fabric to the top of jar. Attach a gift tag to the top with twine or ribbon with the preparing / baking directions. (I use pre-strung shipping tags found at an office supply store).

Below is the recipe to be included with the Cookie Mix:
Gluten-Free Raisinet & Chocolate Chip Cookies

½ cup of butter, plus a bit more for greasing the cookie sheet
1 egg
2 teaspoon vanilla extract
1 quart jar of Gluten-Free Raisinets & Chocolate Chip Cookie Mix

Preheat the oven to 375 degrees F.

In a large bowl cream the butter. Add in the egg and vanilla. Blend well.

In a separate bowl, pour the Gluten-Free Raisinets & Chocolate Chip Cookie Mix. Blend well to ensure the ingredients are well mixed.

Little by little, add the cookie mix into the cream butter mixture, mixing well after each addition.

Drop tablespoon portions of the dough onto a greased cookie sheet. Bake for about 10 minutes.

Yields 3 dozen cookies.

Gluten-Free M&M Cookie Mix

2 cup gluten-free all-purpose flour blend
½ teaspoon baking powder
½ teaspoon baking soda
1 cup M&M candies
1 ¼ cup of sugar
¼ cup M&M candies

Other:
1 quart wide mouth Mason jar
Ribbon / Fabric / Tulle
Printed recipe tag
Twine / string to hang recipe tag

Layer the ingredients in the order above in a wide mouth Mason jar, or similar. Pack each layer (with the exception of the M&M’s) with the back of a spoon or other utensil (the backside of a mallet for meat works great) before adding the next ingredient. You can also “skim” the edges of each layer to get a clean line by using a slim rubber spatula before adding the next ingredient.

Note that when you add the sugar over the 1 cup of M&M candies the sugar will “sift” down between the candies; this will give the jar a fun look. After adding the sugar, you will add the last ¼ cup of M&M candies – when you add this layer, position the candies around the sides of the jar, so that they form a ring around the glass.

Seal the top tightly. And keep jar upright. Place a ribbon and/or piece of fabric to the top of jar. Attach a gift tag to the top with twine or ribbon with the preparing / baking directions. (I use pre-strung shipping tags found at an office supply store).

Below is the recipe to be included with the Cookie Mix:
Gluten-Free M&M Cookies

½ cup of butter, plus a bit more for greasing the cookie sheet
2 eggs
1 quart jar of Gluten-Free M&M Cookie Mix

Preheat the oven to 375 degrees F.

In a large bowl cream the butter and the eggs. Blend well.

In a separate bowl, pour the Gluten-Free M&M Cookie Mix. Blend well to ensure the ingredients are well mixed.

Little by little, add the cookie mix into the cream butter mixture, mixing well after each addition.

Drop tablespoon portions of the dough onto a greased cookie sheet. Bake for about 10 minutes.

Yields 3 dozen cookies.


Be Free For Me Blog is proudly powered by WordPress
Entries (RSS) and Comments (RSS).