Archive for the ‘Recipes’ Category

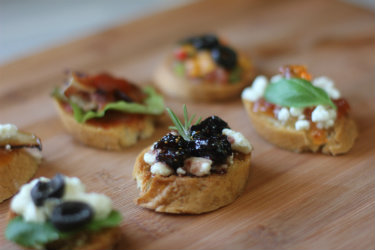
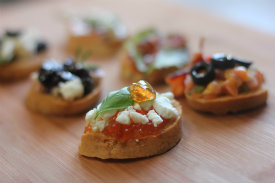
Gluten-Free Crostini Appetizers

Sunday, December 30th, 2012

If you’re looking for a gluten-free appetizer that will be loved by all (aka: even the non-gluten-free folks) check out these gluten-free crostini appetizers.

Crostini means “little toasts” in Italian which is so fitting, since the secret in making the most crunchiest, savory and flavorful crostini lies in the perfect toasting of the bread.

I made my crostinis with Udi’s new French Baguettes. The texture of these baguettes is light and airy. They sliced effortlessly and toasted to perfection.

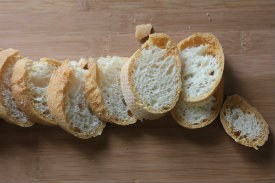
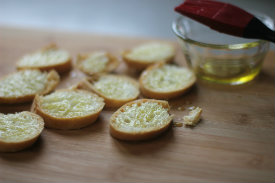
The first step on making crostini is to slice the baguette at a 45 degree angle using a serrated knife. Next, brush with olive oil and place under a broiler until the toasts are just starting to take on a light golden color. Keep your eye on them when toasting, and be careful not to over broil. When the bread is light yellow in color and still glimmering with olive oil you know you have achieved the perfect little toast.

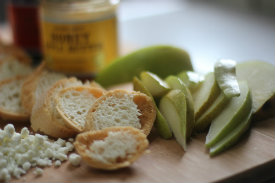
After you remove the little toasts from the broiler you top them with ingredients. This is where some folks may scratch their head and be at a loss. My only rule of thumb is that you select ingredients that complement each other. Ingredients that give you a medley of flavors that provides the perfect balance in just one simple bite.

Need some inspiration? Look at a menu of a gourmet pizza shop and use the gourmet toppings as inspiration for your gluten-free crostini creations.

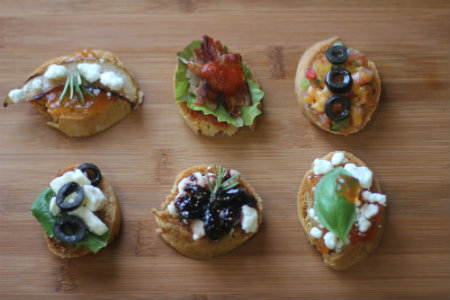
Here are some of my favorite scrumptious crostini toppings that I’ve come up with:

Top Row; Left to Right (click on links below for recipes):

–    Broiled Pear and Apple Butter Crostini with Goat Cheese and Rosemary
–    The BLT: Crostini with Tomato Sauce, and topped with a Baby Lettuce Leaf and Smoky Bacon
–    The Southwestern: Tomato Salsa with Sharp Cheddar and Black Olive Crostini

Bottom Row; Left to Right (click on links below for recipes):

–    The Greek: Feta and Black Olive Crostini with a Greek Dressing Drizzle and Baby Spinach Leaf
–    Goat Cheese with Fig Compote and Rosemary Crostini
–    Red Pepper Jelly Crostini with Goat Cheese and Basil

Do you have a Crostini Topping you’d like to share? Please do in the comment section  below!

Holiday Gift Idea: Gluten-Free Cookie Mix in a Jar

Thursday, December 20th, 2012

What to give? What to give? It seems that every Holiday season that question pops-up time and time again… A small token of thanks to the Mom in the neighborhood who gets your kids off the bus, gives them an after-school snack, and watches them for a hour or so whenever you’re in a bind; a little something for your hair stylist who son just got diagnosed with celiac disease; or a hostess gift for your sister who, every year, has a huge whole-family holiday get-together, and, like you, is on a gluten-free diet.
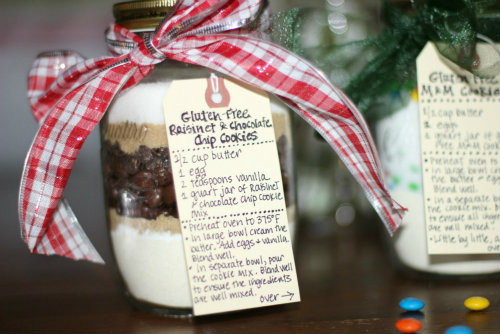
Often I like to make a big batch of gluten-free cookies as a token of my appreciation. But let’s face it… sometimes I just don’t have the time, or the oven space, to make the dozens and dozens of cookies needed to show my gratitude.

That is when I decided to give the gift of convenience – both for me and the recipient of the gift: Gluten-Free Cookie Mix in a Jar.

For me the gift is perfectly convenient since no baking is required and many jars for gifting can be assembled at one time. And for the recipient the gift is perfect since they can bake off the cookies after the holidays – after the hustle and bustle, and after the platter-after-platter of holiday cookies have been gobbled up.

At the end of this blog I have included instructions on making two of my favorite gluten-free baking mixes, along with the coinciding recipes to attach to the jars with the baking directions. You can also “jar” your own favorite cookie mix too if you choose. Following are some basic rules of thumb when “jarring” gluten-free cookie mixes:

The Jar: Use a 1 quart mason jar / or screw top jar. A wide mouth jar is easier to get the ingredients in layers, and using a canning funnel makes the job easier too.

4 Cups = 1 Quart: Remember that there is 4 cups in 1 quart. This means that all of the ingredients that you include in your 1 quart jar should equal approximately 4 cups. Remember though that there is a bit of space for “air” at the top of each jar… so you have a bit of extra room if needed. I often use a 1 liter jar to give myself a bit more room to add in extra chocolate chips, M&M’s or other yummy mix-ins.

Layer It: When you layer the ingredients put the “finer” (think gluten-free flours and granulated sugar) at the bottom of the jar, layered with the medium texture items (such as oatmeal and raisins) and finally topped with the chunkiest ingredients (This would include M&M’s, Candy Bar Chunks, Chocolate Chips). Before you start layer think to yourself, “Will this ingredient be able to sift through a lower layers in the jar?”  If the answer is yes, layer those ingredients towards the bottom of the jar.

Stack the Layers: After you put in a layer of an ingredient, push the ingredient down with the back of a spoon, your fingers, or the side of a meat mallet. This will make a better presentation and will ensure all the ingredients fit in the jar. You can use a slim rubber spatula to “edge” each layer for a nice clean line.

Raisinet & Chocolate Chip Gluten-Free Cookie Mix
1 ¾ cup gluten-free all-purpose flour blend
1 1/2 teaspoon salt
1 teaspoon baking powder
¼ cup brown sugar, plus 2 tablespoon
1 cup Raisinets (I used ½ cup dark chocolate and ½ cup of milk chocolate. NOTE: One 3.5 ounce package yields ½ cup)
¼ cup chocolate chips (check label for allergens)
¼ cup brown sugar
¾ cup sugar

Other:
1 quart wide mouth Mason jar
Ribbon / Fabric / Tulle
Printed recipe tag
Twine / string to hang recipe tag

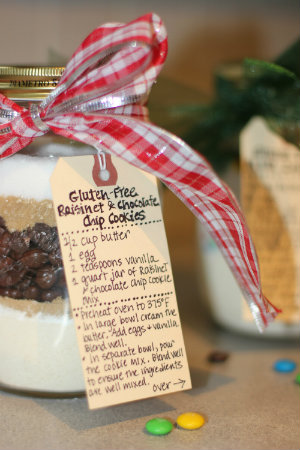
Layer the ingredients in the order above in a wide mouth Mason jar, or similar. Pack each layer (with the exception of the Raisinete’s and Chocolate Chips) with the back of a spoon or other utensil (the backside of a mallet for meat works great) before adding the next ingredient. You can also “skim” the edges of each layer to get a clean line by using a slim rubber spatula before adding the next ingredient. Be extra careful to pack the brown sugar layers to ensure the Raisinets and the chocolate chips stay secure.

Seal the top tightly. And keep jar upright. Place a ribbon and/or piece of fabric to the top of jar. Attach a gift tag to the top with twine or ribbon with the preparing / baking directions. (I use pre-strung shipping tags found at an office supply store).

Below is the recipe to be included with the Cookie Mix:
Gluten-Free Raisinet & Chocolate Chip Cookies

½ cup of butter, plus a bit more for greasing the cookie sheet
1 egg
2 teaspoon vanilla extract
1 quart jar of Gluten-Free Raisinets & Chocolate Chip Cookie Mix

Preheat the oven to 375 degrees F.

In a large bowl cream the butter. Add in the egg and vanilla. Blend well.

In a separate bowl, pour the Gluten-Free Raisinets & Chocolate Chip Cookie Mix. Blend well to ensure the ingredients are well mixed.

Little by little, add the cookie mix into the cream butter mixture, mixing well after each addition.

Drop tablespoon portions of the dough onto a greased cookie sheet. Bake for about 10 minutes.

Yields 3 dozen cookies.
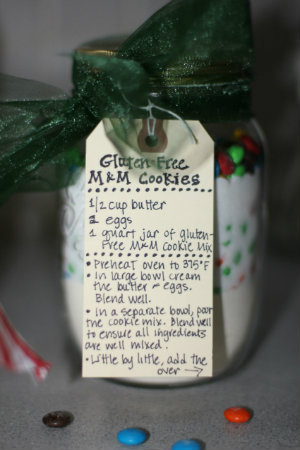
Gluten-Free M&M Cookie Mix

2 cup gluten-free all-purpose flour blend
½ teaspoon baking powder
½ teaspoon baking soda
1 cup M&M candies
1 ¼ cup of sugar
¼ cup M&M candies

Other:
1 quart wide mouth Mason jar
Ribbon / Fabric / Tulle
Printed recipe tag
Twine / string to hang recipe tag

Layer the ingredients in the order above in a wide mouth Mason jar, or similar. Pack each layer (with the exception of the M&M’s) with the back of a spoon or other utensil (the backside of a mallet for meat works great) before adding the next ingredient. You can also “skim” the edges of each layer to get a clean line by using a slim rubber spatula before adding the next ingredient.

Note that when you add the sugar over the 1 cup of M&M candies the sugar will “sift” down between the candies; this will give the jar a fun look. After adding the sugar, you will add the last ¼ cup of M&M candies – when you add this layer, position the candies around the sides of the jar, so that they form a ring around the glass.

Seal the top tightly. And keep jar upright. Place a ribbon and/or piece of fabric to the top of jar. Attach a gift tag to the top with twine or ribbon with the preparing / baking directions. (I use pre-strung shipping tags found at an office supply store).

Below is the recipe to be included with the Cookie Mix:
Gluten-Free M&M Cookies

½ cup of butter, plus a bit more for greasing the cookie sheet
2 eggs
1 quart jar of Gluten-Free M&M Cookie Mix

Preheat the oven to 375 degrees F.

In a large bowl cream the butter and the eggs. Blend well.

In a separate bowl, pour the Gluten-Free M&M Cookie Mix. Blend well to ensure the ingredients are well mixed.

Little by little, add the cookie mix into the cream butter mixture, mixing well after each addition.

Drop tablespoon portions of the dough onto a greased cookie sheet. Bake for about 10 minutes.

Yields 3 dozen cookies.
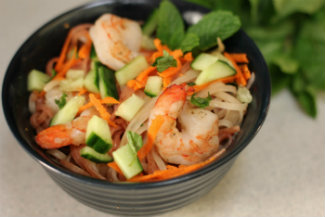
Vietnamese Noodle Salad: Check out the video!

Monday, October 1st, 2012

O.K. I admit it. I’m addicted.

My addiction? Cooking shows and videos. Maybe it’s the “I-think-I-could-make-that” gumption that overtakes me every time I see a fabulous dish being prepared right before my very eyes on my computer screen or TV; or maybe it’s the lure of exploring new and exciting dishes – recipes that require some ingredient that I haven’t tried before, but have enticed me and have beckoned me to explore in the past.

That’s why I was so excited to review the National Foundation for Celiac Disease Awareness’s Alternative Appetites cooking video that features a likeable & fun personality, Dan Kohler, who triple-confirmed my confidence that I too could make a fabulous dish that even contains a few items that are not on my weekly shopping list.

The Alternative Appetites video shows how to make a Vietnamese Noodle Salad that is made with Thai Kitchen’s new Brown Rice Noodles. The noodles come in three great varieties: Brown Rice, Red Rice, and Purple Rice & Corn.These noodles are great because they cook-up in minutes and are perfect for a quick lunch or dinner. I also like the way the noodles come in 4 single serve packs per box. No waste, and perfect for making a noodle side dish or a quick lunch for one. This recipe also features Mirin and Thai Kitchen’s Roasted Chili Paste – two ingredients that I’ve been dying to play around with and try in recipes, but never really knew how to use them.

This recipe is really easy and quick to make. The whole thing was ready in less than 20 minutes which makes it a fantastic weekday dish. And tasty it is too. I loved the way the slight heat of the Thai Kitchen Roasted Chili Paste, mellowed perfectly with the cool chopped cucumber I used to top the salad.

I also love the way this recipe allows you to make it your own. Love carrots? Gotta thing for pea pods? Craving some ginger? No problemo. Grate, slice or chop some up and use as a topping on this salad to make it your own.

This recipe is a keeper, and one you all should try! It got me even further out of my gluten-free cooking comfort zone and has most definitely made its way onto my family’s dinner menu rotation. Thanks NFCA and your Alternative Appetites video series! Also, make sure to check out more Thai Kitchen videos and more blogger reviews here.

BONUS: Want to win some of these Thai Kitchen products? The NFCA is hosting a weekly giveaway now through 10/12/12. Enter to win here!

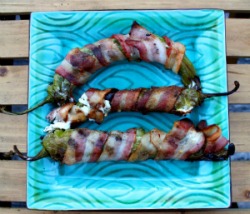
Gluten-Free Grilled Bacon Wrapped Blackened Pepper Poppers

Saturday, September 8th, 2012

Sometimes you like things hot. Really hot. But this weekend I quickly discovered that my garden’s peppers are, yes indeed, an example of something that is just way, way too hot.

So what is a girl to do with a garden-full of way, way too hot peppers?

And then suddenly a super-cool idea popped into my mind. Grilled Bacon Wrapped Blackened Pepper Poppers.

The saltiness of the smoked bacon, the creamy smoothness of the cream cheese and the blackened grilled peppers are sure bets to offset the spicy capsaicin, the stuff that makes peppers wicked hot.

The key to reducing the spiciness of the peppers in this recipe is the removal of the ribs, membranes and seeds in the peppers. This is a sure way to reduce, but not eliminate some of the heat. Also the casein in the cream cheese helps ease the burn, while the fat, mixed with the oils from the peppers helps neutralize the heat. I also think that blackening the pepper skins helps lower the Richter Scale of hotness.
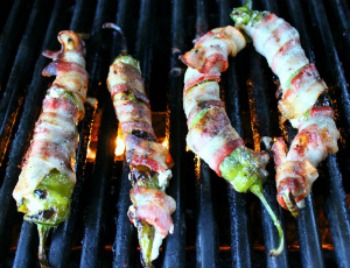
Oh… and a word of caution – please (pretty please?) make sure that you wear plastic disposable gloves when preparing this recipe. Hot peppers are serious stuff.

Grilled Bacon Wrapped Blackened Pepper Poppers

Ingredients:
5-6 medium sized hot peppers, (such as Italian, serrano or similar)

About 2 tablespoons olive oil

One 8-ounce package of cream cheese – softened

10-12 slices of smoked bacon

1-2 pairs of plastic disposable gloves (important when handling peppers!)

Directions:
Wearing a pair of disposable plastic gloves, slice each pepper lengthwise, leaving the stems intact.

Using a paring knife, a small fork and your fingers, carefully remove all seeds, ribs and membranes from inside the pepper (basically all of the white stuff inside the peppers). Brush the sides and inside of the pepper with olive oil.

Preheat a gas grill to medium heat, and place the peppers onto the grill, turning occasionally until slightly blackened. (Note: you could also use a broiler to do this too).

Remove the peppers from the grill and carefully stuff the peppers with the cream cheese. Wrap each stuffed pepper with one to two slices of bacon, and place back on grill and cook, carefully turning occasionally, until the bacon is slightly crispy and cooked through.

Serve immediately.

Serves 3-6 as an appetizer.

Out-of-the-Blue Gluten-Free Blueberry Crumble

Friday, August 3rd, 2012

Rushing back to the office one day last week, I caught a glimpse of some wording on a beat up tattered sign on the side of a country road right at my town’s edge.

Blueberries. Pick Your Own.

OPEN.

And at that time, all the hurries and hassles of getting back to the office went out to the wild blue yonder.  I realized that the contentment of being a little girl and blueberry picking on a hot summer day with my mom and two sisters in southeastern Massachusetts (read more about that in this blog post) could be renewed from a memory to a reality.

And just like that, out of the blue, my day went from fanatic to fantastic.

Before I knew it I was out in the blueberry field, picking and plopping, picking and plopping, one glorious berry at a time into my bucket while dreaming of a yummy, quick & easy gluten-free dessert to make for dinner that night.

After all, a girl does need to be rewarded for her efforts once in awhile. =)

While waiting my turn to pay for my bounty (by the way it was an “honor-system” pay system. How honestly cool is that?) I realized I was rested, relaxed, and had accomplished a ton. Well, not exactly a ton – but 2 whole pounds of blueberries.

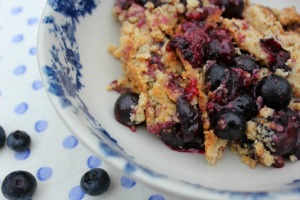
My dessert creation ended up being a Gluten-Free Blueberry Crumble adapted from a recipe I found in my recipe box from years and years ago.

The result: A wonderful ending to an out-of-the-blue absolutely perfect fantastic day.

Enjoy!

Out-of-the-Blue Gluten-Free Blueberry Crumble
Best made with fresh picked blueberries… serve topped with fresh whipped cream or vanilla bean ice cream.

Crumble Crust and Top:
1 cup plain, unsalted almonds
2 cups gluten-free flour blend (like Jule’s Gluten-Free Blend, Bob’s Red Mill Gluten-Free Flour Blend or
King Arthur Gluten-Free Multi-Purpose Flour )
½ cup, plus 1 tablespoons sugar
1 teaspoon cinnamon
¾ cup of chilled butter, cut into small pieces

Filling:
½ cup granulated sugar
1 ½ tablespoons corn starch
1 teaspoon cinnamon
2 pints fresh blueberries – washed, dried and stemmed

Preheat oven to 350 degrees F.

Place the almonds on a cookie sheet and place in the pre-heated oven for about 10 minutes to roast. During the cooking time, toss to turn the nuts.

Remove nuts from the oven and increase the oven temperature to 450 degrees F.

Place the roasted almonds in a food processor or blender. Process the nuts until finely ground (about 10 seconds) being careful not to process too much (or you’ll end up with Almond Butter!)

In a large bowl, mix together the ground almonds, gluten-free flour, sugar and the cinnamon. Cut in the chilled butter pieces until crumbly using two forks and / or your fingers.

Using you fingers, press half of the crumbs on the bottom and up the sides of an 8 to 9” tart or pie plate. Set aside.

In a medium bowl, mix together the sugar, cornstarch and cinnamon. Next, very carefully blend in the blueberries, taking care not to smoosh the berries. Evenly spoon the blueberry mixture into the crust.

Sprinkle the top with the remaining crumbles. Bake in the 450 degree F preheated oven for about 25 minutes, watching very carefully the last 5 minutes of cooking time since the edges will brown quickly!

Serve warm with fresh whipped cream or vanilla bean ice cream.

Ask Shelley Case: Summer Fruits – More Than Just a Healthy Snack

Saturday, July 14th, 2012

Question:

Shelley: I love the summer since there are so many seasonal fresh fruits and they are  my favorite on-the-go snack! Do you have any other interesting ways to incorporate them into my gluten-free diet?

Answer:

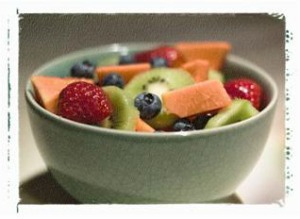
Cheers to you for reaching for a piece of fruit for a healthy gluten-free snack while on the run! Summertime is the season for fresh, local fruits and with a little know-how and recipe ideas, it is easy to incorporate summer’s fresh bounty into breakfast, lunch, dinner & dessert – as well as snack time.

Smooth Moves: Fruit smoothies are easy, quick and most important – portable, which makes them a perfect breakfast for those that eat on the run. Start with a base of cow’s milk, almond milk, soy milk or yogurt; combine in a blender with fresh berries, ground flax and honey – blend and enjoy! Smoothies are also a great way to get kid’s excited about breakfast. Really rushed in the morning? Combine all the smoothie ingredients in the blender the night before so you can just “blend and go” in the morning!

Need some smoothie recipe ideas? Check these out:
Very-Berry Breakfast Shake
Melon-Lemon Smoothie

Learn to do the Salsa: Most people only think of the sweet flavors of fruits and lend them only to desserts. But surprisingly, fruit is perfect paired with spicy and savory herbs and spices, which can perfectly balances the natural sugars that are plentiful in most summer fruits. Chopped cilantro gives a tropical flair to this Mango Salsa over Swordfish dish or try this sweet, savory and delicious Grilled Chicken with Rosemary Pear Salsa with a Citrus Zest.

“Nice Cubes”: Toss some grapes, cherries, strawberries or blueberries into a plastic bag and freeze. These frozen little fruits make perfect edible ice cubes for summer drinks.

Fruity Sippers: Add some fruit slices in a large pitcher of water and keep in your refrigerator all summer long. Your whole family will love the fruit infused taste. Check out this Fruit Infusion Pitcher that makes drinking water all summer healthy and easy!

Jam It: Make some homemade quick and easy jam. Add some blueberries, raspberries, or sliced strawberries and peaches in a blender, and pulse until the texture is spreadable. Enjoy on your favorite gluten-free whole grain bread, along with a hard-boiled egg for a perfect breakfast.

Salad Mix-Ins: Get tired of boring salads? Add in some fruit and kick your salads up a notch! Halved grapes go perfect in chicken salad, sliced strawberries are great toppers for a spinach salad, and mangos sliced thinly and tossed with arugula create a sweet, yet tangy salad creation. The goal is thinking beyond the traditional salad bowl and getting yourself out of the habit of adding just vegetables to salads!

Dessert on the Grill: Try grilling sliced peaches, mangos, bananas or pineapple. The natural sugars in the fruit caramelize to create a perfectly natural sweet treat. An added bonus – Grilled fruit is also a no-guilt / no-gluten after dinner treat! Need some recipe ideas and tips on how to grill fruit?  Check out this article: http://befreeforme.com/ViewArticle.aspx?Term=fruit&ArticleID=51

Ask Shelley Case is a feature of BeFreeForMe.com. It is published the second Tuesday of each month. Shelley Case, RD is a Consulting Dietitian, Speaker and Author of Gluten-Free Diet: A Comprehensive Resource Guide. Visit Shelley and get more gluten-free tips & info at: GlutenFreeDiet.ca

Move over Strawberry Shortcake: Hello Gluten-Free Strawberry Tall-Cake

Monday, July 9th, 2012

For years I’ve been craving Strawberry Shortcake. The little foamy yellow cake cup. The sliced sweet strawberries. The freshly whipped cream.

But being gluten-free makes the traditional Strawberry Shortcake come up, well, short.

Not being able to enjoy that little foamy cake cup saturated with the juices of the sweet strawberries makes this favorite dessert not the same at all.

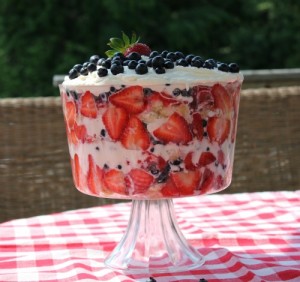
But who needs traditional shortcake when you can layer all the yummy ingredients in a tall trifle bowl?

The result is free-form Strawberry Shortcake that is full of fresh strawberries, blueberries, gluten-free cake sweetened with just enough strawberry juices, and fresh whipped cream. It’s a visibly appealing dessert that will have your family and friends oohing and aahing… and not even knowing it’s gluten-free.

Strawberry Tall-Cake
1 package gluten-free vanilla cake mix
The Berries: 1 quart fresh strawberries and 1 pint fresh blueberries
3½  tablespoons sugar, separated
3 tablespoons water
1 quart whipping cream
2 teaspoons vanilla extract

Prepare the cake according to package directions (I used Bob’s Red Mill Vanilla Gluten-Free Cake Mix for this recipe and photo, but you can use any brand). Once done let cool completely.

When the cake is baking, wash and hull strawberries (leaving one perfect large strawberry aside for garnish). Slice the strawberries into slices and place into a large bowl.  Sprinkle with 2 tablespoons of sugar and the water, and blend. Wash and stem the blueberries and set aside.

Pour the whipping cream into a large bowl, add the last 1½ tablespoon of sugar and the vanilla extract. Beat with an electric blender until stiff peaks form. Set aside.

Rip apart the cake into 2-2 ½” chunks. Place several chunks of cake in the bottom of the trifle dish. Top with the strawberry slices, a sprinkle of blueberries and then some whipped cream. Repeat process until the layers reach the top of the trifle dish. End with a layer of whipped cream and top with a sprinkle of blueberries and that one one large perfect strawberry.

Refrigerate until ready to serve. Enjoy!

Serves 8-12.

Udi’s Gluten-Free Bread & Horizon Organic Grilled Cheese Challenge: Prosciutto and Blackberry Grilled Cheese Sandwich with a Balsamic Reduction

Monday, April 30th, 2012

The Grilled Cheese sandwich is such a comfort food. The oozey, gooey cheese… the perfectly toasted gluten-free  bread that is crunchy & buttery on the outside, and soft & warm on the inside.  Perfection.
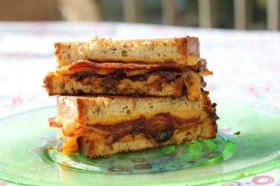
But if just the “basic” grilled cheese sandwich has so much perfection going on – what could a little creativity fueled by a bunch of fanatic grilled cheese lovin’ foodies create? Udi’s Gluten-Free Bread, in partnership with Horizon Organic Cheese, has taken on this feat and is sponsoring a challenge among a group of top food bloggers and chefs. The task? To create an original,  unique & delicious Grilled Cheese Sandwich.

First off… I was thrilled that I was asked to compete in this challenge… so thank you Udi’s and Horizon Organics. Secondly, I’ve come up with three Grilled Cheese creations that will each blow your gluten-free griddles off.

Along with the first gluten-free grilled creation listed below, my Prosciutto & Blackberry Grilled Cheese Sandwich with a Balsamic Reduction, I have also created a Cherrywood Smoke Bacon & Date Stuffed Grilled Cheese Sandwich, which is reminiscent of my favorite appetizer of all time (Blue Cheese Stuffed Dates Wrapped in Cherrywood Smoked Bacon) and also a fantastic breakfast grilled cheese creation – a Honey-Apple & Strawberry Grilled Cheesy Breakfast Sandwich.

Thanks to Udi’s Gluten-Free Bread and Horizon Organic Cheese for getting my grill-ative forces moving! Enjoy!

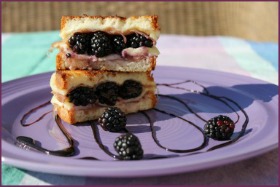
Prosciutto and Blackberry Grilled Cheese Sandwich with a Balsamic Reduction

Who said Grilled Cheese Sandwiches had to boring? This sandwich is salty, sweet and tangy…. All grilled into one. I really stuffed my sandwich with blackberries (since I love them so much) but use fewer or even substitute blackberry preserves. The Balsamic Reduction creates a unique dipping experience!

Ingredients:
About 1 tablespoon butter
2 slices of Udi’s Omega Flax & Fiber Bread (or your favorite Udi’s gluten-free bread)
2-4 slices of Horizon Organic Provolone Cheese
4 slices thin-sliced Prosciutto
10-12 ripe blackberries – or 2 tablespoons blackberry preserves
1/8 cup Balsamic Vinegar
2 tablespoons sugar

Instructions:
Spread 1 tablespoon of butter on one side of each slice of bread. Place one of the slices of bread butter side down in a skillet over medium heat.

Place 1-2 slices of cheese on the bread. Next top with ½ the prosciutto, the blackberries, the remaining prosciutto, and 1-2 slice of cheese.  Top with the remaining piece of bread, butter side up.

Cook for about 6-7 minutes, flipping to ensure each side is golden brown.

While the sandwich is grilling, heat the balsamic vinegar in a small saucepan over high heat. The vinegar will boil quickly, so whisk often to prevent scorching. Add in the sugar little-by-little. Cook, and continue whisking, until the vinegar is reduced by about ½ and is syrupy and thick.

Drizzle the Balsamic Reduction in a fun pattern on the plate. Place the halved sandwich on top. Dip sandwich into the reduction for a tangy dipping experience!

Makes 1 sandwich.

Udi’s Gluten-Free Bread & Horizon Organic Grilled Cheese Challenge: Cherrywood Smoked Bacon & Fig Stuffed Grilled Cheese Sandwich

Monday, April 30th, 2012

This Grilled Cheese Sandwich is my adaptation of my favorite appetizer, Blue Cheese Stuffed Dates Wrapped in Cherrywood Smoked Bacon. By substituting the blue cheese with Horizon Organic Cheddar Cheese you’ll find cheese that melts beautifully, with a sharpness that mates well with the sweetness of the figs and the smoky bacon.
This is also a perfect appetizer. After cooking cut into bite-sized strips and serve.

Want to see other Grilled Cheese Creations using Udi’s Gluten-Free Bread and Horizon Organic  Cheese? Check out these links:

Prosciutto and Blackberry Grilled Cheese Sandwich with a Balsamic Reduction

Honey-Apple & Strawberry Grilled Cheesy Breakfast Sandwich

Cherrywood Smoked Bacon & Fig Stuffed Grilled Cheese Sandwich

Inspired by my favorite appetizer, Cheese Stuffed Dates Wrapped in Cherrywood Smoked Bacon, this combination takes the grilled cheese sandwich to the next level.

Ingredients:

4 slices cooked Cherrywood Smoked Bacon
2 slices of Udi’s Gluten-Free White Sandwich Bread
About 1 tablespoon of butter, for the skillet
1 ½ tablespoons Fig Butter or Fig Preserves (find this in the jam section of your local grocer)
2 slices of Horizon Organic Cheddar Cheese

Instructions:
Equally spread the Fig Butter equally on each slice of bread.

In a large skillet, heat the butter over medium heat. Once the butter is melted, place a slice of bread Fig Butter side up in the skillet. Top with a slice of cheese. Next top with the cooked Cherrywood Smoked Bacon (halved) and then the second slice of cheese. Place the second slice of bread Fig Butter side down on sandwich.

Cook for about 6-7 minutes, flipping to ensure each side is golden brown and the cheese is melted, ooey and gooey.

Serve immediately.

Makes 1 Fig-licious sandwich.

Udi’s Gluten-Free Bread & Horizon Organic Grilled Cheese Challenge! Honey-Apple & Strawberry Grilled Cheesy Breakfast Sandwich

Monday, April 30th, 2012

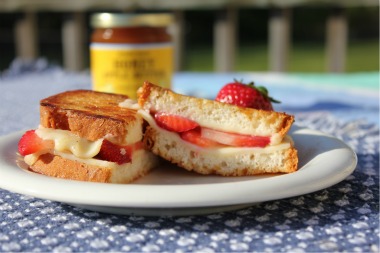
If you’re like me and you love grilled cheese sandwiches so much that you could eat them for every meal, every day, you need a few suggestions on how to grill them up for breakfast.

This sandwich is sweet, crunchy and packed with fresh strawberries. Love by kids and adults alike, it will soon be a family favorite.

Want to see other Grilled Cheese Creations using Udi’s Gluten-Free Bread and Horizon Organic  Cheese? Check out these links:

Prosciutto and Blackberry Grilled Cheese Sandwich with a Balsamic Reduction

Cherrywood Smoke Bacon & Date Stuffed Grilled Cheese Sandwich

Honey-Apple & Strawberry Grilled Cheesy Breakfast Sandwich

A breakfast sandwich with no eggs? Absolutely! The addition of Honey Apple Butter makes Udi’s Gluten-Free Bread even softer than it already is. Good Morrrnnn-ing, Gluten-Free!

Ingredients:
2 slices of Udi’s Gluten-Free White Sandwich Bread
3 Tablespoons Honey-Apple Butter, plus 1 tablespoon for the skillet (I used Trader Joe’s brand – but any type will do)
About 1 tablespoon of butter, for the skillet
2 slices of Horizon Organic Provolone Cheese (or American)
2 Strawberries – washed, hulled and sliced thin

Instructions:
Spread 2 tablespoon of Honey-Apple Butter equally on each slice of bread.

In a large skillet, heat the butter, plus one tablespoon of the Honey-Apple Butter, over medium heat. Once melted, place a slice of bread Honey-Apple side up in the skillet. Top with a slice of cheese. Next top with the sliced strawberries and the second slice of cheese. Place the second slice of bread Honey-Apple side down on sandwich.

Cook for about 6-7 minutes, flipping to ensure each side is golden brown and the cheese is melted, ooey and gooey.

Serve immediately and start your day off Udi-fully.

Makes 1 delicious sandwich.


Be Free For Me Blog is proudly powered by WordPress
Entries (RSS) and Comments (RSS).